
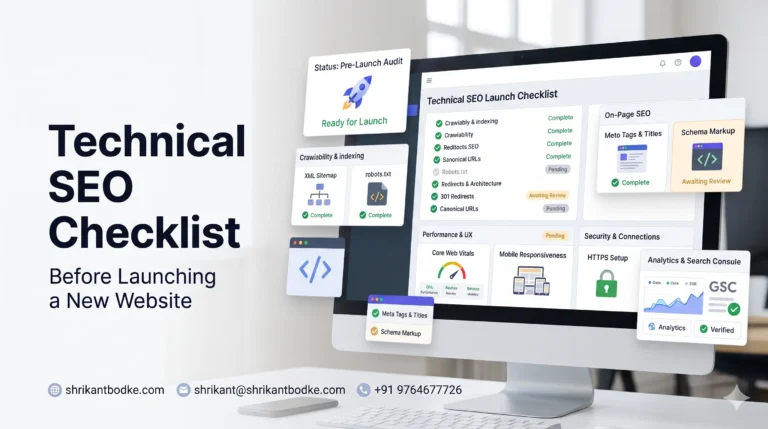
Launching a new website is exciting. But before you point your domain to the new server and announce that your website is live, there is one thing you should do first:
Run a technical SEO check
A website can look perfect to visitors and still have problems that prevent search engines from properly crawling, understanding, indexing, or ranking its pages.
Broken redirects, accidental noindex tags, incorrect canonical URLs, missing XML sitemaps, slow pages, staging URLs, duplicate content and poorly structured internal links can all create problems after launch.
That’s why I recommend treating SEO launch readiness as part of the development process, not something you deal with after the website goes live.
🚀 Free Technical SEO Pre-Launch Checklist
Don’t want to keep switching between your browser and this article while launching your website?
I’ve created a practical Technical SEO Pre-Launch Checklist PDF that you can download and use during your own website launch, redesign or migration.
Download the Free Technical SEO Pre-Launch Checklist PDF
The checklist includes:
- Crawlability and indexing
- Robots.txt
- XML sitemap
- URL structure
- 301 redirects
- Canonical URLs
- Meta titles and descriptions
- Heading structure
- Internal linking
- Mobile SEO
- Core Web Vitals
- Image optimization
- Structured data
- HTTPS and security
- Analytics
- Google Search Console
- 404 errors
- Forms and conversion paths
- Accessibility
- Post-launch monitoring
You can print it, keep it beside your development workflow, or use it as a final QA checklist before launch.
Why Technical SEO Should Be Checked Before Launch
One of the biggest mistakes developers and businesses make is treating SEO as a post-launch activity.
The usual process looks something like this:
Design → Development → Testing → Launch → “Now let’s do SEO.”
A better process is:
SEO planning → Design → Development → Technical SEO → Testing → Launch → Monitoring
Some SEO problems are much easier to prevent than to fix later.
For example, if your new website changes URL structures, you should plan redirects before the old URLs disappear.
If your staging website contains noindex, that’s fine.
If that same noindex accidentally reaches production, you have a very different problem.
Google recommends using crawlable URLs, standard crawlable links, sitemaps and appropriate robots controls to help search engines discover and process website content. Google also notes that sitemaps are discovery hints rather than guarantees of crawling or indexing.
Technical SEO Pre-Launch Checklist
1. Make Sure Your Website Is Crawlable
Before launch, check whether search engines can actually access your important pages.
Check:
- Important pages can be reached through normal HTML links.
- Public pages are not accidentally blocked.
- Important CSS and JavaScript resources are accessible.
- There are no accidental login barriers.
- Staging restrictions will not remain on production.
- Important content is available in crawlable HTML.
A beautiful website that search engines cannot properly access is not ready to launch.
2. Check Your Robots.txt File
Your robots.txt file controls which resources crawlers are allowed to access.
Before launch, check:
- Does /robots.txt exist?
- Is it intentionally configured?
- Are important pages accidentally disallowed?
- Are important CSS or JavaScript resources blocked?
- Are staging or private areas handled correctly?
- Does the sitemap URL appear where appropriate?
One important distinction: robots.txt controls crawling. It is not the same thing as a noindex directive.
Google’s current documentation explicitly distinguishes robots.txt crawling controls from noindex indexing controls.
3. Generate and Check Your XML Sitemap
Your XML sitemap helps search engines discover important URLs.
Before launch:
- Generate your XML sitemap.
- Make sure it contains canonical URLs.
- Remove broken URLs.
- Remove redirected URLs.
- Remove URLs that should not be indexed.
- Check that the sitemap loads correctly.
- Submit it through Google Search Console after launch.
Don’t assume that submitting a sitemap means Google will immediately index everything.
Google describes sitemaps as useful suggestions for discovery, not guarantees of crawling or indexing.
4. Check Every Important URL
Make a list of your important pages.
For a business website, this might include:
- Homepage
- About page
- Services
- Individual service pages
- Portfolio
- Case studies
- Blog
- Important blog posts
- Contact page
- Landing pages
Then verify that every important URL:
- Loads correctly
- Returns the expected HTTP status
- Has the correct canonical URL
- Is internally linked
- Is indexable
- Has appropriate metadata
This is especially important during redesigns and migrations.
5. Set Up 301 Redirects
If you’re replacing an existing website, don’t simply delete the old URLs.
Create a redirect map.
For example:
Old URL → New URL
/old-service-page/ → /web-development/
Use permanent redirects when a page has permanently moved.
Also check for:
- Redirect chains
- Redirect loops
- Redirecting everything to the homepage
- Incorrect redirect destinations
- Missing redirects for high-value old URLs
A migration without a redirect plan can turn an otherwise successful redesign into an SEO recovery project.
6. Check Canonical URLs
Canonical URLs tell search engines which version of a URL should be treated as the preferred version when duplicate or near-duplicate URLs exist.
Check:
- Canonical tags exist where appropriate.
- Canonicals point to the correct URL.
- Canonicals use HTTPS.
- Canonicals use the preferred domain version.
- Canonicals aren’t pointing to unrelated pages.
- Important pages aren’t accidentally canonicalized elsewhere.
Don’t blindly copy canonical tags across templates.
Each page should have a canonical strategy that makes sense for that page.
7. Check Meta Titles and Descriptions
Every important indexable page should have useful metadata.
Check:
Title tags
- Unique
- Descriptive
- Relevant to the page
- Includes the primary topic naturally
- Not stuffed with keywords
Meta descriptions
- Unique where appropriate
- Useful to searchers
- Accurately describes the page
- Includes the primary topic naturally
Remember that writing a meta description does not guarantee Google will display exactly what you wrote.
The goal is to provide a useful description of the page, not to force a specific search-result snippet.
8. Check Heading Structure
Review your headings before launch.
Check:
- One clear primary H1 where appropriate
- Logical H2 sections
- H3 sections where necessary
- No headings used purely for visual styling
- Important topics represented in the heading structure
For example:
H1: Technical SEO Checklist Before Launching a New Website
H2: Crawlability
H2: Indexing
H2: Performance
H2: Structured Data
H2: Security
This creates a much clearer structure for both users and search engines.
9. Test Internal Links
Internal linking is one of the easiest SEO improvements to overlook during development.
Check:
- Important pages have internal links.
- No important page is isolated.
- Internal links don’t point to 404 pages.
- Redirected URLs are replaced with their final URLs.
- Anchor text describes the destination.
- Blog posts link naturally to relevant services and related articles.
For example, if you’re discussing slow WordPress websites, link readers to your detailed guide:
Why Your WordPress Website Is Slow
If you’re discussing migrations, link to:
Website Redesign Without Losing SEO Rankings
Internal links should help users continue their journey, not simply exist for SEO.
10. Check Mobile Responsiveness
Google uses the mobile version of a site for indexing and ranking.
Before launch, test:
- Homepage
- Navigation
- Menus
- Forms
- Buttons
- Images
- Tables
- Blog posts
- Service pages
- Popups
- Sticky elements
Test on actual mobile devices when possible.
A page that works perfectly at 1440px wide may behave very differently on a 390px screen.
11. Test Core Web Vitals
Performance should be checked before launch, not after users start complaining.
Pay attention to:
- Largest Contentful Paint
- Interaction to Next Paint
- Cumulative Layout Shift
Also check:
- Image sizes
- Font loading
- JavaScript
- CSS
- Third-party scripts
- Server response time
- Caching
- Lazy loading
Use PageSpeed Insights and real performance data where available.
Don’t optimize only the homepage.
Test important page templates.
A blog post, product page, service page and landing page can all have very different performance characteristics.
12. Optimize Images
Large images are one of the most common causes of slow websites.
Before launch:
- Resize images to appropriate dimensions.
- Compress images.
- Use modern formats where appropriate.
- Add meaningful alt text where needed.
- Avoid loading unnecessarily huge images.
- Check responsive image behaviour.
- Lazy-load appropriate below-the-fold images.
Don’t upload a 4000px image simply because the CMS accepts it.
13. Validate Structured Data
Structured data helps search engines understand specific types of content.
Depending on your website, you may use structured data for things such as:
- Organization
- Person
- Article
- Breadcrumb
- Product
- Local business
- FAQ content where appropriate
Important:
Only add structured data that accurately represents visible page content and follows the relevant guidelines.
Structured data is not a shortcut to rankings.
It can help search engines understand content and can make eligible pages suitable for certain search features, but rich-result display is never guaranteed.
14. Check HTTPS and Security
Before launch:
- HTTPS works correctly.
- HTTP redirects to HTTPS.
- There are no mixed-content warnings.
- SSL certificate is valid.
- Forms work securely.
- Admin areas are protected.
- Backups are available.
- CMS and plugins are updated appropriately.
Security is not something to check after launch.
It is part of launch readiness.
15. Remove Staging and Development Artifacts
This one causes surprisingly many problems.
Before production launch, search for:
- Lorem ipsum
- Dummy content
- Test pages
- Temporary URLs
- Developer comments
- Staging domains
- Test accounts
- Placeholder images
- Development analytics IDs
- Temporary scripts
- Test forms
Also check your source code and CMS settings.
A website can look finished while still containing development leftovers underneath.
16. Check Analytics
Before launch, confirm your analytics setup.
Check:
- Analytics tracking code
- Google Tag Manager
- Conversion tracking
- Contact form events
- Important button clicks
- Ecommerce tracking if applicable
- Duplicate tracking codes
Don’t wait until three months after launch to discover that your contact form conversions were never tracked.
17. Verify Google Search Console
Before or immediately after launch:
- Verify your domain/property.
- Confirm the correct property is being used.
- Submit the XML sitemap.
- Inspect important URLs.
- Check indexing reports.
- Monitor crawl errors.
After launch, use URL Inspection to check important pages.
Google notes that new pages can take several days or more to be noticed and crawled, so don’t panic if a brand-new page doesn’t appear in search immediately.
18. Test the 404 Page
Your 404 page should be useful.
Check that:
- It actually returns a 404 HTTP status.
- It has the same branding as the rest of the website.
- Users can return to the homepage.
- Useful navigation remains available.
- It doesn’t redirect every missing URL to the homepage.
A good 404 page helps users recover from mistakes.
19. Check HTTP Status Codes
Run a crawl or URL audit before launch.
Look for:
- 200 pages
- 301 redirects
- 302 redirects
- 404 errors
- 410 responses where appropriate
- 500 server errors
- Soft 404s
Pay particular attention to: 5xx errors
These indicate server-side problems and should be investigated before launch.
20. Test Forms and Conversion Paths
SEO brings visitors.
Your website needs to convert them.
Test:
- Contact forms
- Quote forms
- Newsletter forms
- Booking forms
- Checkout
- Login
- Registration
- Thank-you pages
- Email notifications
- CRM integrations
- WhatsApp/contact buttons
Submit every important form yourself.
Then check whether the submission actually reaches the intended destination.
21. Check Accessibility
SEO and accessibility often overlap.
Review:
- Keyboard navigation
- Form labels
- Image alternatives
- Heading structure
- Link text
- Contrast
- Focus states
- Accessible buttons
- Mobile usability
A technically impressive website that is difficult to use is still a poor website.
22. Test the Website Before Removing the Staging Site
Before pointing the production domain to the new website, perform one final staging audit.
Compare:
Old website
vs.
New website
Check:
- URLs
- Content
- Metadata
- Internal links
- Redirects
- Images
- Structured data
- Performance
- Forms
- Tracking
If you’re doing a migration, keep a copy of the old URL list.
It can save you a lot of time later.
The Ultimate Website Launch SEO Checklist
Before clicking “Publish”, make sure you’ve checked:
Crawlability
- Important pages are crawlable
- robots.txt is correct
- No accidental noindex directives
- Important resources are accessible
Indexing
- XML sitemap created
- Sitemap contains correct URLs
- Search Console configured
- Important URLs inspected
URLs
- URLs are descriptive
- URL structure is consistent
- HTTPS is enforced
- Canonicals are correct
- Redirects are configured
Google’s current URL guidance recommends descriptive URLs and using hyphens to separate words.
On-Page SEO
- Title tags checked
- Meta descriptions checked
- H1/H2 structure checked
- Image alt text reviewed
- Internal links checked
Performance
- Mobile performance tested
- Core Web Vitals reviewed
- Images optimized
- JavaScript reviewed
- CSS reviewed
- Third-party scripts reviewed
Structured Data
- Relevant schema implemented
- Schema validated
- Markup matches visible content
Security
- HTTPS working
- SSL valid
- Mixed content removed
- Backups completed
- Admin/staging protected
Analytics
- Analytics installed
- Search Console verified
- Conversion tracking tested
- Forms tested
UX
- Mobile navigation tested
- Forms tested
- 404 page tested
- Accessibility reviewed
- No placeholder content remains
📥 Download the Complete Checklist
You’ve just gone through the checklist, but you probably don’t want to keep this article open every time you launch a website.
That’s why I created a printable PDF version.
Get the Technical SEO Pre-Launch Checklist
Use it when you’re:
- Launching a new website
- Redesigning an existing website
- Migrating to WordPress
- Moving to a new domain
- Launching a WooCommerce store
- Rebuilding a business website
- Taking a website from staging to production
Download the free Technical SEO Pre-Launch Checklist PDF.
It includes checkboxes for the complete technical SEO review plus a Launch Readiness Scorecard so you can quickly identify areas that need another QA pass.
What To Do After Your Website Goes Live
The launch isn’t the end of technical SEO.
It’s the beginning of monitoring.
Day 1
Check:
- Homepage
- Important service pages
- Contact forms
- Navigation
- HTTPS
- Robots.txt
- XML sitemap
- Search Console
- Analytics
Days 1-3
Check:
- Indexing
- Crawl errors
- Server errors
- Redirects
- Forms
- Analytics
- Performance
First Week
Monitor:
- Search Console
- Index coverage
- Search visibility
- Organic traffic
- Core Web Vitals
- 404 errors
- Server errors
- Important conversions
Google recommends using crawlable links, maintaining useful sitemaps and checking robots.txt when new pages are not being discovered as expected.
Website Launch vs SEO Launch
There’s an important difference.
Website launch:
“The website is live.”
SEO launch:
“The website is live, crawlable, indexable, technically sound, measurable and ready to be discovered.”
Those aren’t necessarily the same thing.
A website shouldn’t be considered completely finished just because the homepage loads successfully.
Final Thoughts
Technical SEO is easiest when you build it into the development process from the beginning.
Don’t wait until your website is live to discover that:
- Google can’t crawl important pages
- Your sitemap contains old URLs
- Your staging
noindexreached production - Your redirects are broken
- Your canonical tags are wrong
- Your mobile layout is broken
- Your Core Web Vitals are poor
- Your analytics isn’t tracking conversions
A few hours of structured pre-launch testing can prevent days or weeks of SEO troubleshooting later.
If you’re launching a website, download the Technical SEO Pre-Launch Checklist and run through it before you publish.
And if you’re redesigning an existing website, make sure you also read:
Website Redesign Without Losing SEO Rankings
For performance-related issues, see:
Why Your WordPress Website Is Slow
And if you’re working on Core Web Vitals, continue with:
Core Web Vitals Explained for Business Owners
A technically sound website gives your content, design and marketing a much better foundation to work from.
Frequently Asked Questions
-
What should I check before launching a new website?
Before launching, check crawlability, robots.txt, XML sitemap, URLs, redirects, canonical tags, metadata, headings, internal links, mobile responsiveness, Core Web Vitals, structured data, HTTPS, analytics, Search Console, forms, accessibility and 404 handling.
-
Should I submit my sitemap before or after launching a website?
Prepare the sitemap before launch and submit or update it in Google Search Console once the production website is live. Make sure it contains the final canonical URLs.
-
What is the most important technical SEO check before launch?
There isn’t one single check that matters more than everything else. However, accidental indexing blocks, incorrect robots.txt rules, missing redirects during migrations, broken canonical URLs and inaccessible important pages are high-priority issues.
-
Should a new website have a robots.txt file?
A robots.txt file can be useful for controlling crawler access to resources and URLs that should not be crawled. It should be configured carefully so that important pages and resources aren’t accidentally blocked.
-
Do I need 301 redirects when redesigning a website?
If important URLs change during a redesign or migration, permanent redirects should normally be configured from the old URLs to their appropriate new destinations.
-
How long does it take Google to index a new website?
There is no guaranteed indexing time. Google says that for most sites, new pages can take several days or more to be noticed and crawled.
-
Should I check SEO after the website launches?
Yes. Post-launch monitoring is important. Check Search Console, indexing, crawl errors, redirects, server errors, analytics and performance after the website goes live.
-
Can I launch a website without SEO?
You can technically launch a website without completing an SEO review, but it is risky. Basic technical SEO should be part of the launch process so that search engines can properly access, understand and discover your website.